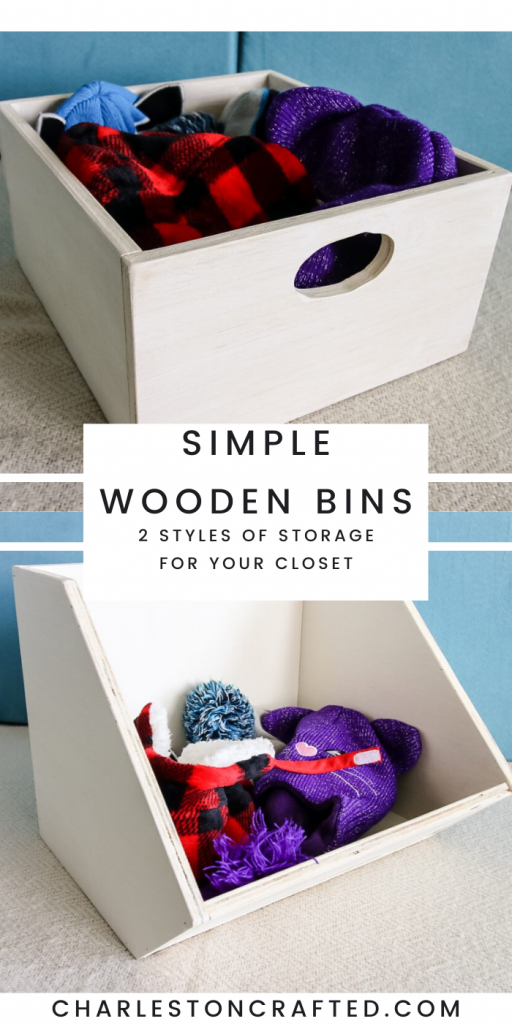
How to Build and Sell Custom Wooden Storage Bins for Clutter-Free Homes

Building and Selling Custom Wooden Storage Bins for Clutter-Free Homes
In today's fast-paced world, maintaining a clutter-free home can feel like an uphill battle. But what if you could create a solution that not only tames the chaos but also adds a touch of rustic charm to your living spaces? Enter the world of custom wooden storage bins â€" a perfect blend of functionality and aesthetic appeal. This article will guide you through the process of building and selling these sought-after pieces, turning your woodworking skills into a profitable venture.
Identifying Your Target Audience
Before you start hammering and sawing, it's crucial to understand who your ideal customer is. Who are you designing these bins for? Consider these factors:
Home Decor Styles
Are you aiming for minimalist modern homes, rustic farmhouse aesthetics, or something in between? Each style calls for different design elements and finishes.
Storage Needs
Are your customers looking for small bins for organizing toiletries or larger bins for storing blankets and seasonal items? Understanding their storage needs will help you tailor your designs.
Budget
While quality materials are important, price is a significant factor for many buyers. Determine your pricing structure based on your target audience's spending habits.
Designing Your Wooden Storage Bins
Once you have a clear idea of your target market, you can start designing your bins. Here's a breakdown of essential considerations:
Material Choice
Select wood types that align with the desired aesthetic and durability. Popular options include pine (affordable and versatile), cedar (naturally fragrant and resistant to insects), and oak (strong and classic).
Dimensions
Determine the optimal size for each bin. Consider the purpose, storage capacity, and the overall aesthetic within the customer's home.
Style and Functionality
Add unique touches to your bins. Consider:
- Handles: Built-in handles make moving the bins easier.
- Lids: Removable or hinged lids provide dust and debris protection.
- Dividers: Interior dividers create compartments for better organization within the bin.
Building Your Wooden Storage Bins
With your designs finalized, it's time to bring your vision to life. Here's a step-by-step guide:
Materials and Tools
Gather all the necessary wood, hardware, and tools, including:
- Woodworking tools: Saw, drill, sander, etc.
- Hardware: Screws, hinges, handles, etc.
- Finish: Stain, paint, or sealant, based on the chosen aesthetic.
Construction
Follow your designs carefully. Ensure accurate cuts, sturdy joints, and precise placement of hardware.
Finishing Touches
Once the bins are built, apply your chosen finish. This step enhances the look and protects the wood. Sanding between coats can help achieve a smooth, even finish.
Marketing and Selling Your Custom Wooden Storage Bins
Now that you have beautiful, functional bins, it's time to get them into the hands of customers. Here are some effective strategies:
Online Presence
Create a website or online store to showcase your products. High-quality photos and detailed descriptions are essential. Consider using social media platforms like Instagram and Pinterest to reach a wider audience.
Local Markets and Events
Participate in craft fairs, farmers markets, and other events to connect with potential customers in person. Having sample bins on display allows people to interact with your work firsthand.
Word-of-Mouth and Referrals
Encourage satisfied customers to share their experiences with friends and family. Offer discounts for referrals to grow your customer base organically.
Building a Successful Business
Selling custom wooden storage bins can be a rewarding endeavor. By focusing on quality craftsmanship, understanding your target audience, and employing effective marketing strategies, you can turn your passion into a profitable business. Remember, consistency, attention to detail, and excellent customer service are key to long-term success.
Comments
Post a Comment